
My experiences at Northwest Camp were a big deal for me and really opened my eyes to a direction I wanted to aim my energies in life (read more here). And it’s not that all the time I spent there was good. On the contrary, it was mixed, and in fact I had some pretty awful times too. In all I only visited a few times, but they had such a formative effect on me that I feel it still guiding me today.
Though I didn’t realize it at the time, the layout of the camp there would serve as a template for my own project at Salamander City, years later. What I’ve been referring to as a “primitive” cabin. What this is, as it turns out, is a mystery to most of the people I know.
When I talk about the place, people immediately imagine what I would call a lodge, not a cabin. Running water, electricity, TV, central heating . . . modern amenities. A house, basically, except that it’s in the woods and has a natural wood finish. If you search the web for pictures of cabins, perhaps to inspire your own project, you find tons of picturesque photos of masterfully-built cabins, with someone wearing a knit cap sitting inside, drinking something hot from a mug and looking out a window at a snowy forest. They get the feel right, but tend to overlook the rougher places, where you poop in a hole and depend on fire to stay warm. The places that are not as picturesque, depending on your tastes. The ones made by people who don’t have that much money, resources, or know-how.
And that’s me.
Hi.
My name’s Mike.
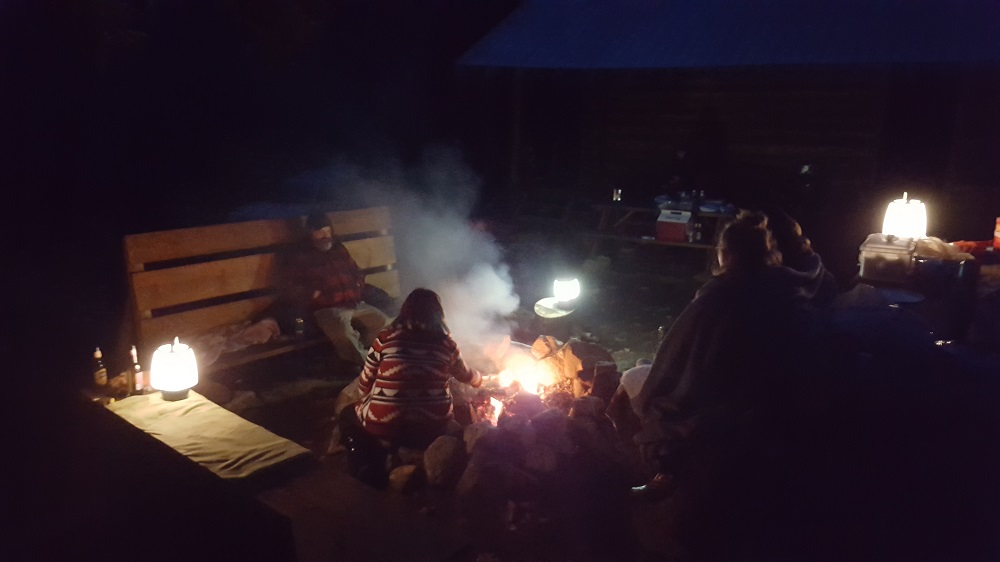
One of the features at Northwest Camp that I really enjoyed was the outdoor fire pit, though I only used it during summer and fall. A group of benches were built around it so that no one had to have chairs. I’d been used to dragging camping chairs with me everywhere, so this was pretty nice. It ended up being an essential element of the Salamander City layout.
My land is on a slope. Not all that gentle of one, either, if you’re hiking it. And I had no plan to level out the ground in the gathering area. This meant that the fire pit sat on tilted ground, and camping chairs were difficult at best, being hard to find even footing and impossible to level. Permanent seating had to compensate.
I knew I’d need tables too, and standard picnic tables were just the thing.
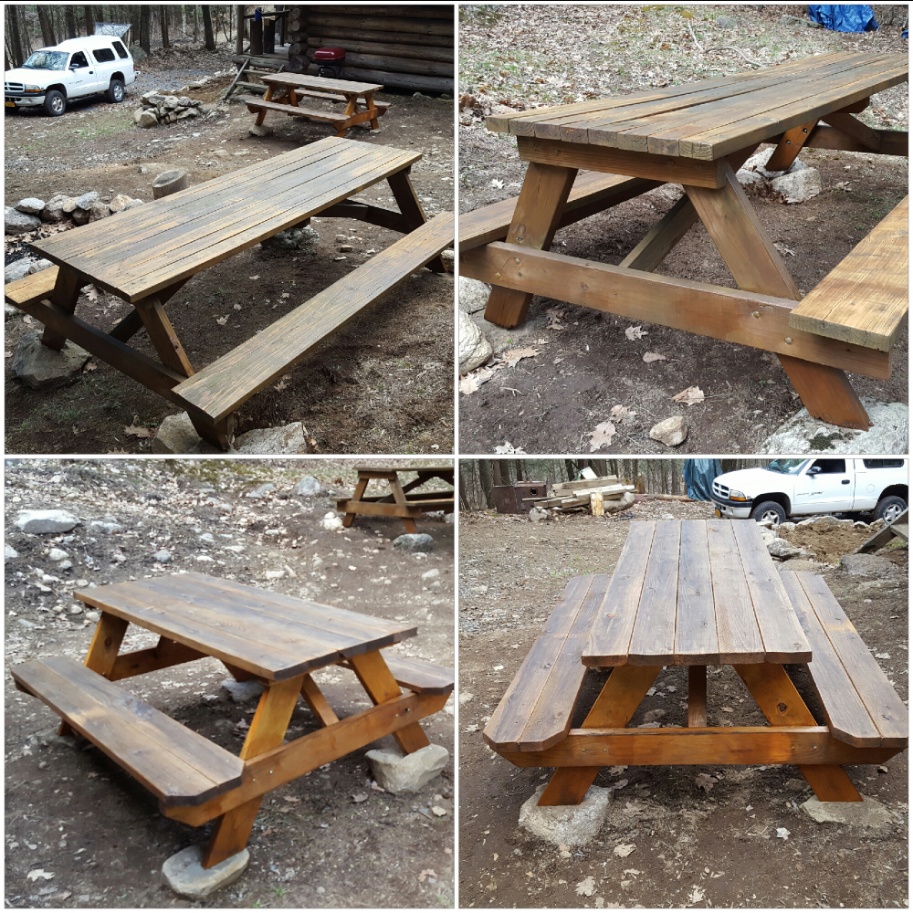
Building the one near the cabin tuckered someone out:

A friend sent a table he’d made a decade prior with me, a stoutly-built 8-footer.
He is excited about Salamander City, as you can see:

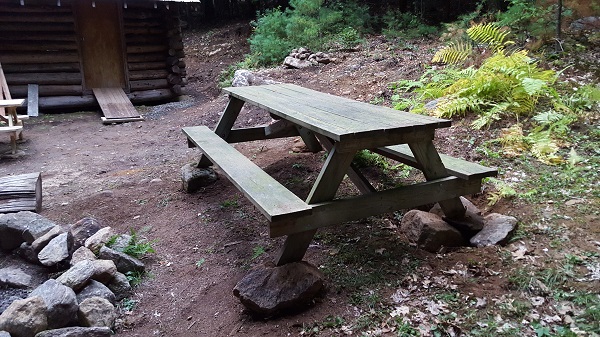
It sits next to the fire pit and thus serves as one of the benches in addition to table space. Due to the slope, two legs had to be elevated with stones and the other two lowered into holes in the ground full of loose rocks, to drain water off the feet and slow their decay.
The two tables just needed a sanding and a few coats of finish, and they came out looking great.
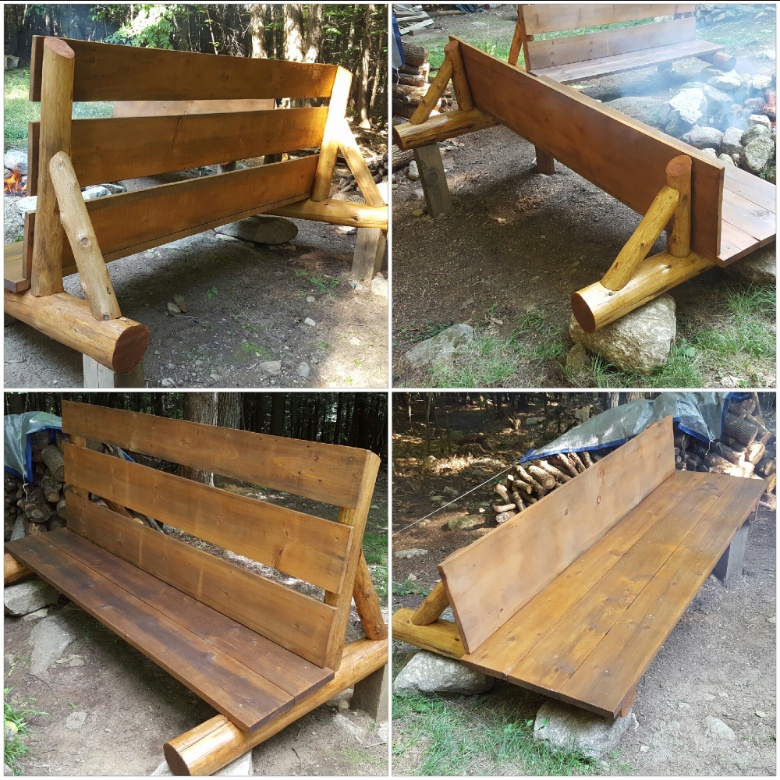
The remaining benches would sit south of the fire and east of it. Careful leveling and creative supports would be needed to make them sit right. I ended up going with pressure-treated 6×6 lumber that I scored off Craigslist for free from someone just getting rid of scrap wood. I dug holes, situated rocks at the bottoms of the holes, and buried lengths of 6×6 in there, using a level to try to keep them poking straight up out of the ground. 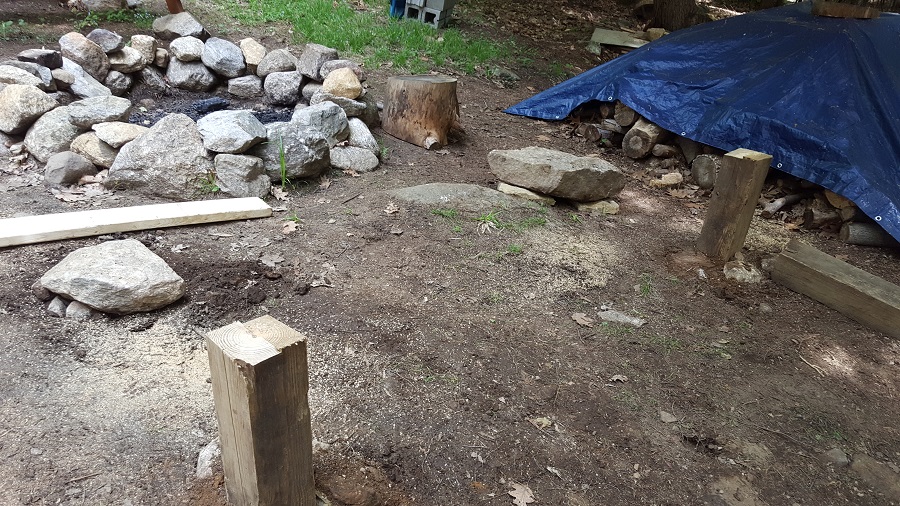 Thankfully, the gathering area had a pretty thick layer of soil compared to other locations on my 2 acres that I’d tried digging into. Where a leg was going to be very short, I dragged very large rocks and placed them on top of the ground, instead. Here and there I needed to dig a little contour in the soil to make the stone sit still and not wobble.
Using my chainsaw, I cut V-shaped divots into the tops of the 6x6s (not pictured), so that a log would sit in the fork and stay put. The logs were a fun find. I found a fellow in Saratoga who was selling white cedar he’d felled in the process of clearing land for a cemetery. He let them go quite cheap, partially because they were untouched since felling and needed to be peeled, as well they hadn’t been down long and were still drying.

I still have some of the smaller pieces of the white cedar, but the big ones were used up in these benches, and also to build a center support for the cabin. Debarking them was tedious work, but I had lots of help from volunteers. The fellow who sold them to me asked me about my project, and we got into a brief conversation where he told me about using specialized grinder wheels to form smooth, even notches in your logs. For those of you who don’t know, notching is the process where you cut a wide groove into a log to accommodate another log, usually done with a chainsaw. You’ve probably seen log cabins that use this technique to hold their corners together. In that case it’s called a saddle notch. If you’re just fitting two pieces and it’s not a corner-stack for a building, it’s usually referred to as coping.
I was excited about the technique and grabbed one of the wheels from the company that makes them (King Arthur’s Tools). I’d spent some time cutting coping with my chainsaw (see the porch legs in this segment), and the idea of using a two-handed grinder instead was pretty heavenly by comparison. I used the grinder to form all the copes that were needed for the support legs, which were a mix of that same white cedar and also some birch I felled there on the property. The trick was getting the pieces to be still while I ground them. For this, I used cinder blocks, sawhorses, and bungees:
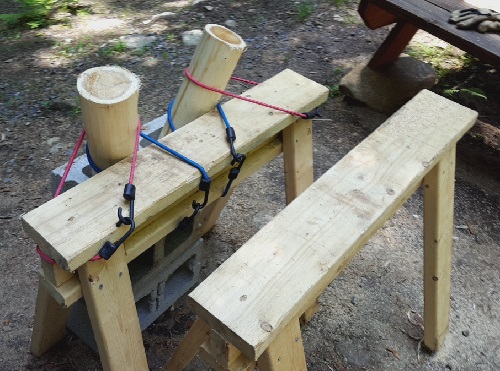
The end result was some nice back supports that gave it a loggy look. For those cuts and copes I just held the log where it needed to be, drew lines, and went from there. There was a lot of back and forth as I tested the piece to see if it fit, then grind some more, then test again. The white cedar has a lovely smell. I didn’t use a mask, so the smell deposited in my nose and stuck with me for days. Connecting the log pieces was done with lag screws, a single one for each connection. Pilot hole first, using special extra-long bits I ordered for this purpose, then a shank hole drilled with a spade bit just far enough in that the head of the screw would seat flatly and fully, then drive the screw. The trick is to get the pieces to fit well together, so that they support themselves and the screw is only there to keep them from slipping out of place.
The butt boards are ordinary hardware store variety, a decision I have come to regret, though primarily only for aesthetic reasons. I would have preferred to use logs cut in half lengthwise, sitting with the rounded edges coped into the footing logs. Perhaps next time. The plain dimensional lumber required support beneath to stay flat when you sit on it, important if you don’t want them shifting differently from one another and possibly pinching butts. They also have that milled surface that is on the smooth side. This can be troublesome for finishes, as I learned with the cedar logs after the first winter. No matter how many coats of finish you apply, the adhesion between the first coat and the wood is the most important, and if the wood is smooth, it won’t stick. The weather will crack and peel it right off, no matter what you use. Sand your wood first to rough it up a bit! One of my helpers and I laid two coats of stain and 3-4 coats of exterior polyurethane on these, and there is still peeling damage due to weather exposure on finishes clinging to smooth wood.
For the back boards I used some locally-felled larch, rough cut, about ¾”. For the bench with the taller back, I spaced them from each other to make the whole area look more open from a distance. Later after some rainfall, I modified the designs shown here by raising the lowest backboard up off the butt boards and re-attaching. Rainwater and leaf litter was collecting where the two boards meet.

I made the benches opposite with regard to dimension, one with a short butt and a tall back, the other with a short back and a deep butt, to facilitate different needs. One is better for sitting and leaning back, the other for lying down. So far, they’ve really worked out great. Oddly, the seat from the table that faces the fire is one of the more popular ones, probably due to the direction of the smoke, which rarely is aimed that way by the breeze.

After only a first few coats of stain, they already looked good.
And the following year (2017), one very helpful fellow spent a long string of weekends adding coat after coat of finish to both the benches and the tables, until they were a deep, rich red and repelled water better than your windshield.

And the rains were finally welcome.

All that was left was butts. Thankfully, I know a few.
~~~>Next: What We Can With What We Have
